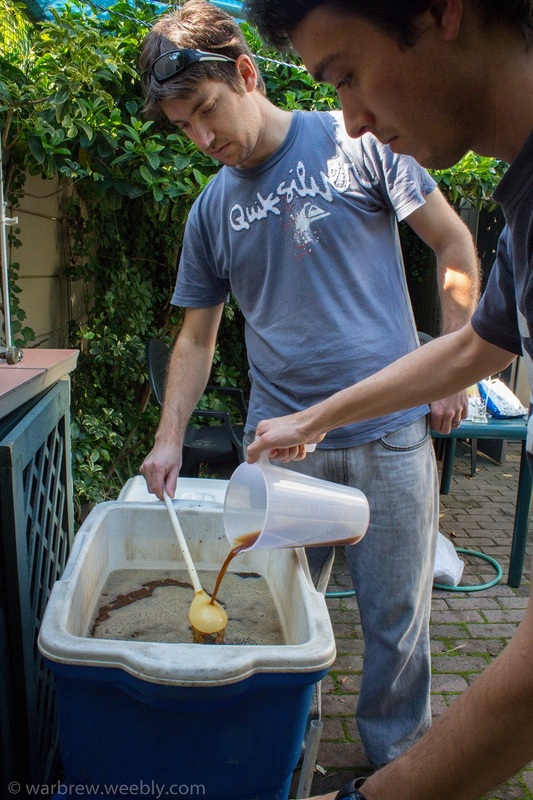
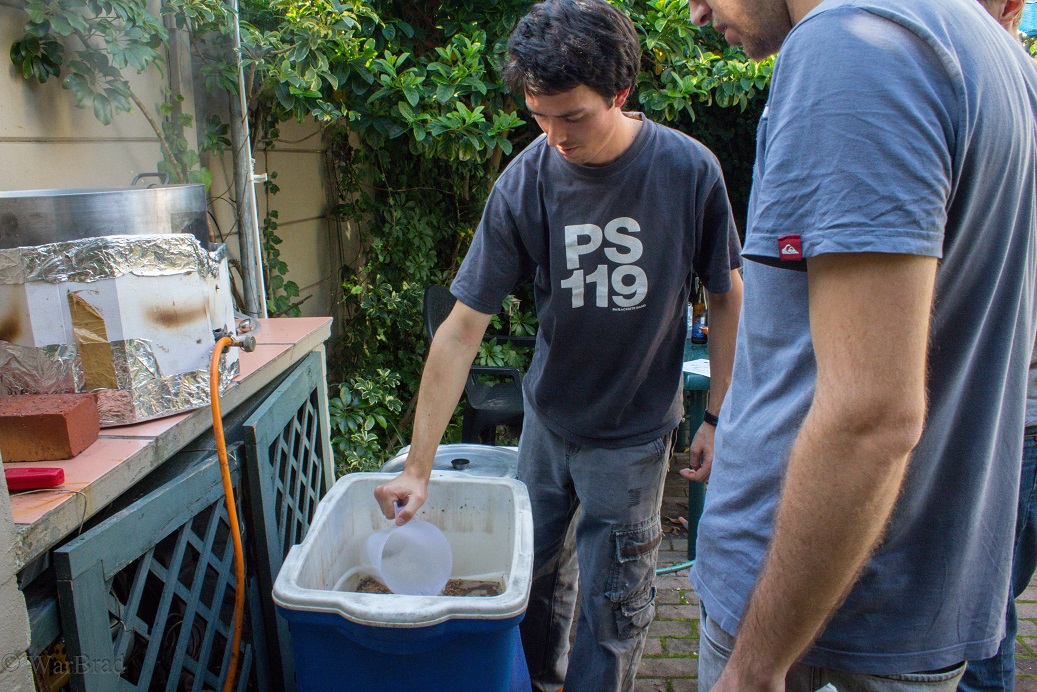
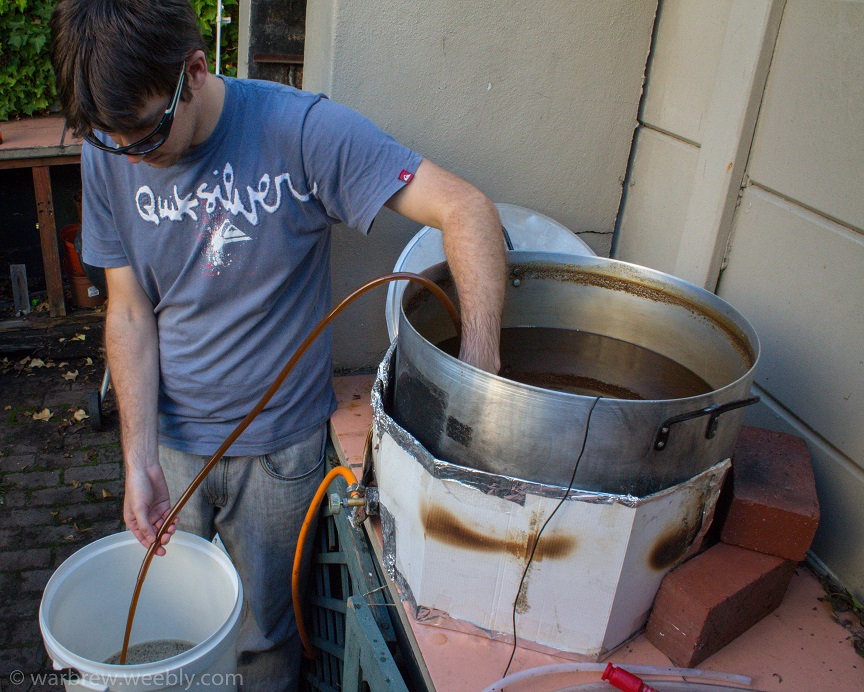
 Graeme and Tim, sparging.
 What do you get when you have a software designer turn into a brewing boffin? Someone that can control his fermentation fridge from his laptop! Yes, you read that correctly, but first let's take a step back and see how this all started...
During my visit to this backyard brewery I was relished in stories of Graeme's successful transition from Hunters cider to now being a near brewery in himself purely based on the amount he regularly brews and likes to share. It all started with a little trip to Europe with mate and fellow brewer, Justin, where beer is cheaper than water and Hunters, I guess, non-existent. Within the first couple of beers he was hooked and suddenly the whole purpose of the trip took on a completely different direction. Now it was all about tasting different styles of beers from different regions and different breweries. Upon return to ZA, they hooked up with mutual friends, Tim and Wes* and so Mowbrew was born.
During my visit to this backyard brewery I was relished in stories of Graeme's successful transition from Hunters cider to now being a near brewery in himself purely based on the amount he regularly brews and likes to share. It all started with a little trip to Europe with mate and fellow brewer, Justin, where beer is cheaper than water and Hunters, I guess, non-existent. Within the first couple of beers he was hooked and suddenly the whole purpose of the trip took on a completely different direction. Now it was all about tasting different styles of beers from different regions and different breweries. Upon return to ZA, they hooked up with mutual friends, Tim and Wes* and so Mowbrew was born.
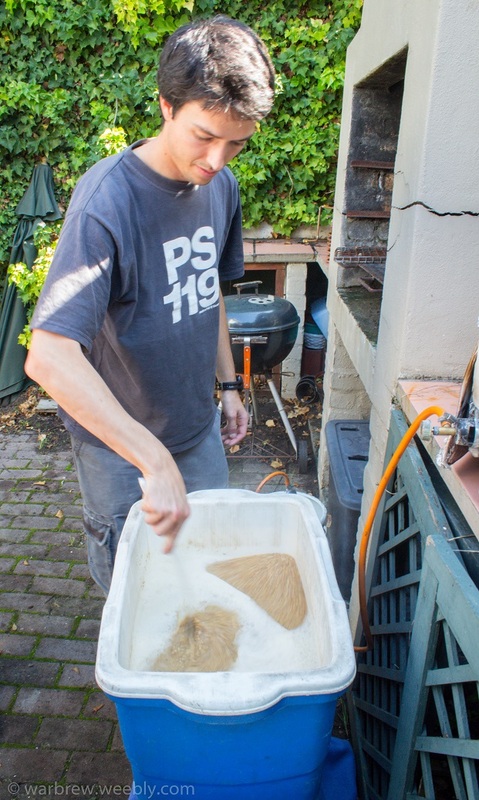
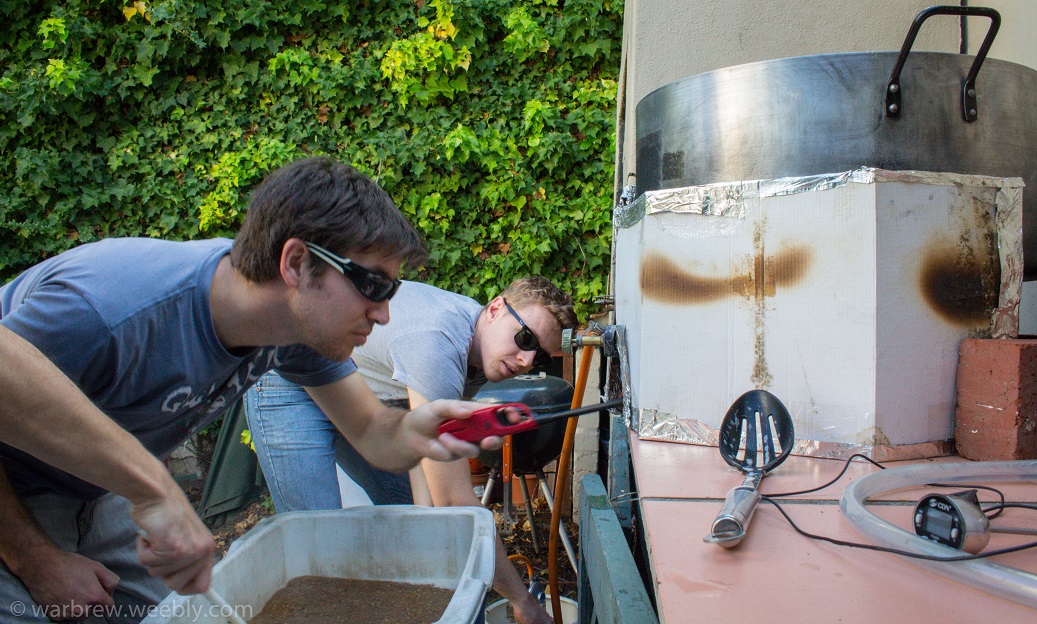
 Justin and Tim, prepping the mash.
 The search for homebrew supplies was near immediate and within a month of return the Mowbrew-crew were mashing their first brew and attending Southyeaster meetings. Within no time they were getting second and third place spots in the monthly competitions and before long taking on bigger and bolder beers like this crazy Imperial IPA (brewed with only South African ingredients). For me it is pretty clear that Graeme is very passionate about beer and more importantly he sure does have a knack for making it. I can definitely vouch for some of the tasty pints I sampled that day - two different versions of a sweet, nutty brown ale and a very drinkable and wonderfully aromatic Citra Pale Ale. Brewing also comes with casualties like the stout that never actually saw the inside of a glass, mostly only stews...
This sounds like a story line that developed over a couple of years, but believe it or not these guys have barely been at it for an entire year. The thing I liked about Mowbrew is the fact that they have brewed a different style with pretty much every brew ranging from Pale Ale, IPA, Weiss, Wit, Brown Ale, Stouts up to the most recent Munich Dunkel - the latter being Graeme's first attempt at a lager.
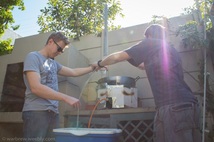
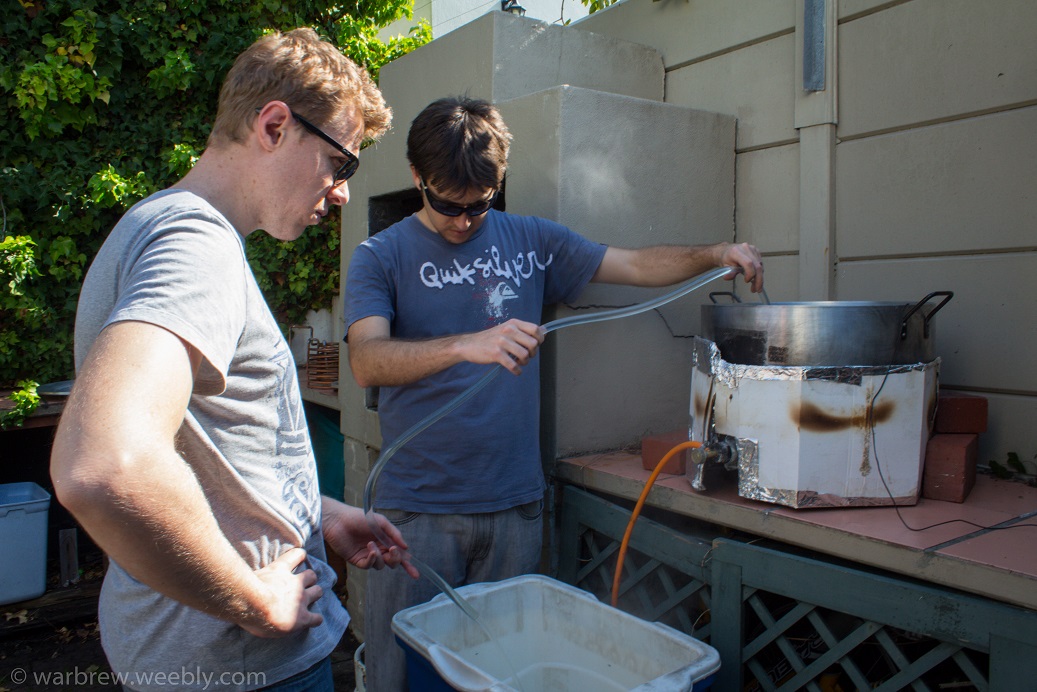
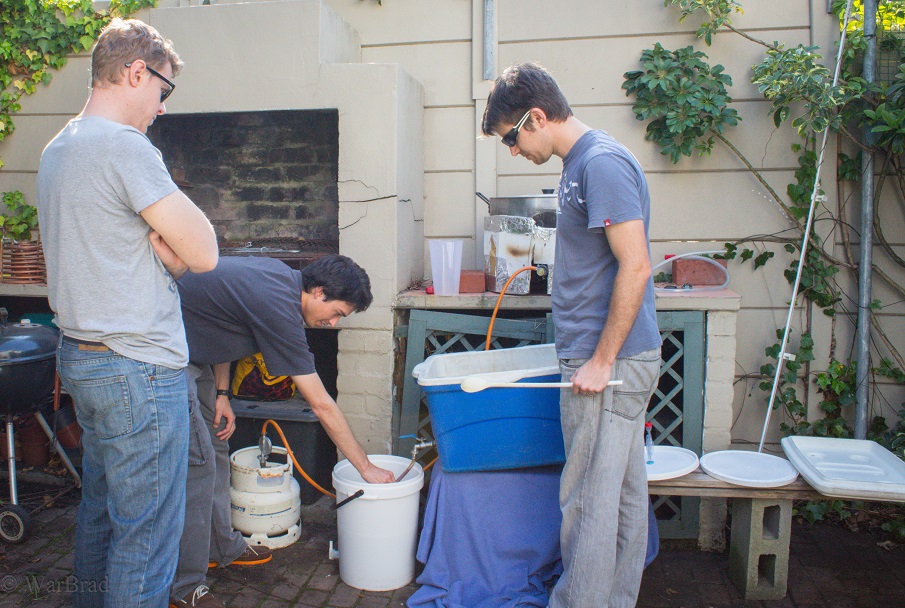
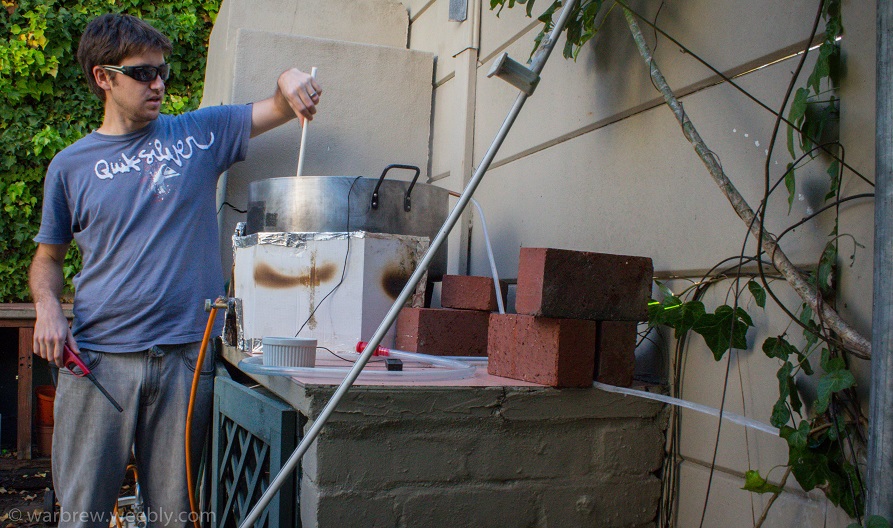
Well, enough of all that, let's get down to the nuts and bolts - the brewing process employed by these guys is pretty standard. They use a "custom guarded " gas burner, one big pot as the HLT and the "kettle", a big converted cooler for a mash tun and then ferment everything in the 25 litre plastic buckets with the tap and airlock system. From what I hear a couple of wooden dining tables and electric ovens have taken the brunt of their "teething problems" over the last couple of months, but a night or two spent on the couch is still worth it I reckon.
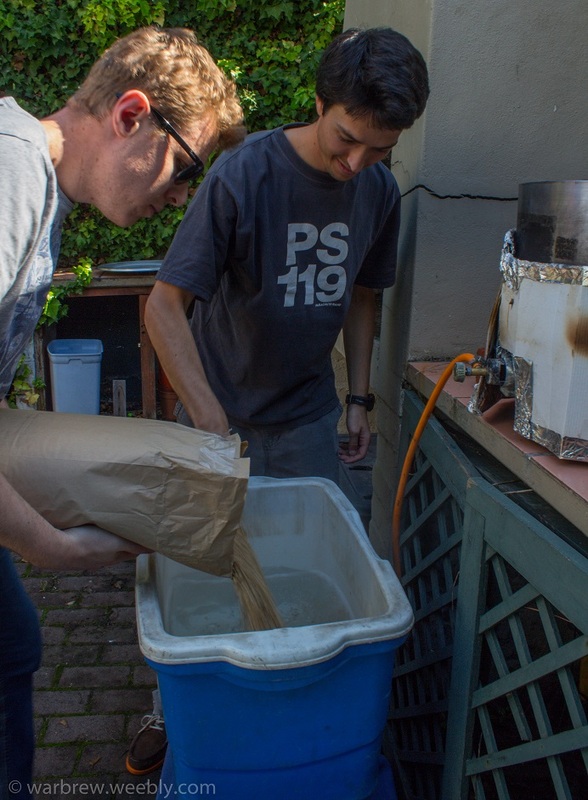
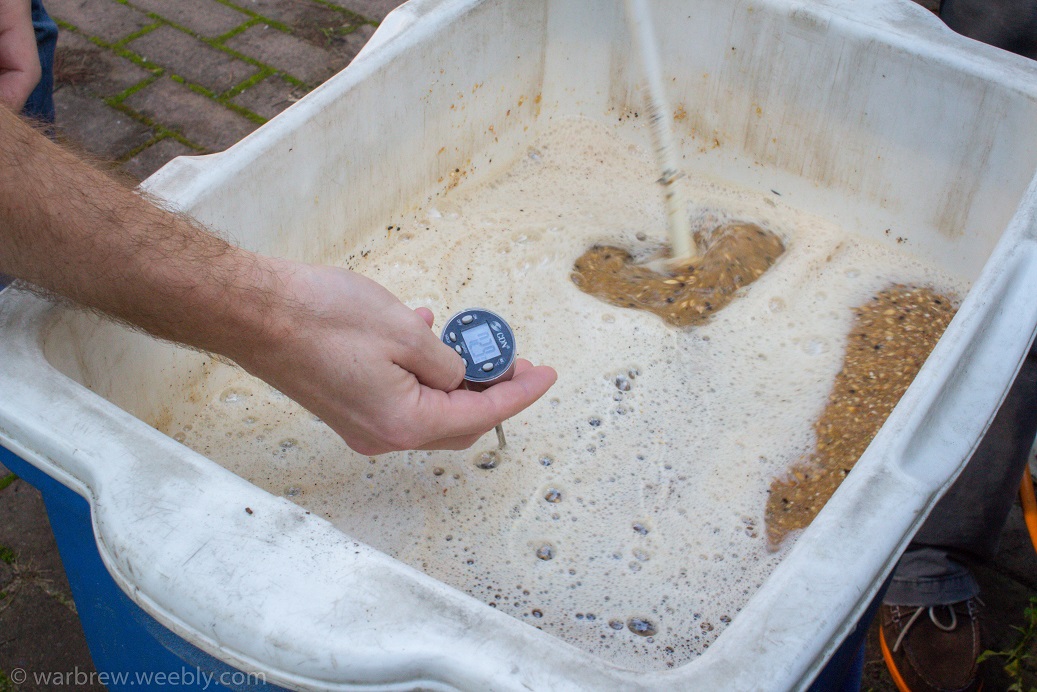
It all starts out with heating up the mash liquor and then syphoning that over into the cooler mash tun. The funny story behind this being that Graeme managed to find a converted cooler online for a bargain...provided he buys like 100 of them as a "packaged deal". OK, more realistically like 25. Luckily being a member of the Southyeasters club is beneficial in this situation as he was able to flog off the extras quite quickly, but I digress. Now the grains are added, stirred thoroughly and the lid dropped before the whole cooler is wrapped in a blanket. The mash tun is then aside for the appropriate time - this is usually reserved for sampling some of the newer/untried bevvies and bottling whatever Graeme is experimenting with between brews. Toward the end of the mash time, one of the iPhones keeping tabs will alert the lads and then the process of starting up the sparge liquor gets underway - again the same pot is used.

The actual sparging process used is referred to as Vorlauf and it is completed over two, similar steps. This is completely new to me and my little "brew-in-the-bag" system, but Graeme has outlined it quite simply as follows:
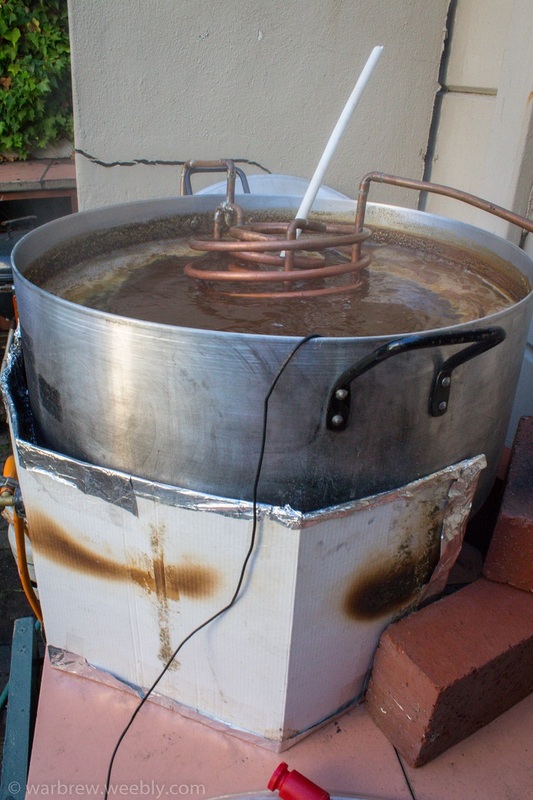
Once all sparged out with the correct volume of water as per the recipe, the boil is started up in the original pot. Hops etc. are then added according to the recipe timing and in the last fifteen minutes the wort-chiller is inserted and eventually connected to the hose to bring the temp down pretty quickly after the boil is done.
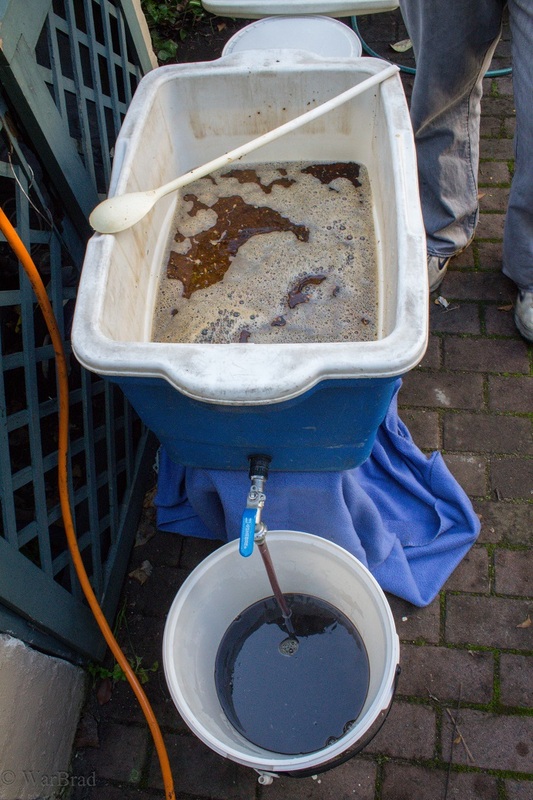
- Open the tap and run off about one to two litres of wort straight from the mash to let most of the small bits of grain out of the filter.
- This is then very gently poured over the back of a spoon over the top of the grain bed and aids in filtering the run-off further
- Now you can run the rest of the wort into a larger bucket or into your brew pot
- Next add all the heated sparge liquor to the tun and then repeat steps 1 through 3
Once all sparged out with the correct volume of water as per the recipe, the boil is started up in the original pot. Hops etc. are then added according to the recipe timing and in the last fifteen minutes the wort-chiller is inserted and eventually connected to the hose to bring the temp down pretty quickly after the boil is done.
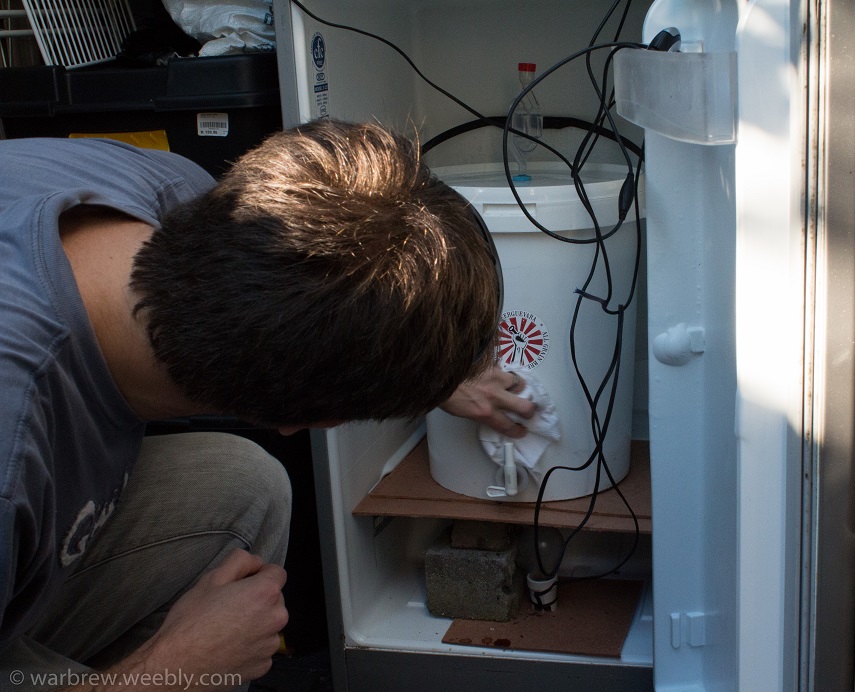
After the wort is cooled to around 30º C it is syphoned over into the sterilised fermentation bucket and covered with the lid and airlock in place. This is where I enquired about the yeast, as I have read and heard on many occasion that the yeast needs to get in there as soon as yeastily possible! "Well, not necessarily” Graeme assured me. "I used to think the same thing in the beginning and sometimes shocked my yeast and ended up having a stuck fermentation as I was adding it too soon or rehydrating with warm water and adding it to a much cooler fermenter which also stopped everything dead." Over the last couple of batches he has been experimenting and adding the yeast the next day which has not proved hazardous or created any issues yet. At this point the fermenter is moved to its new resting place...
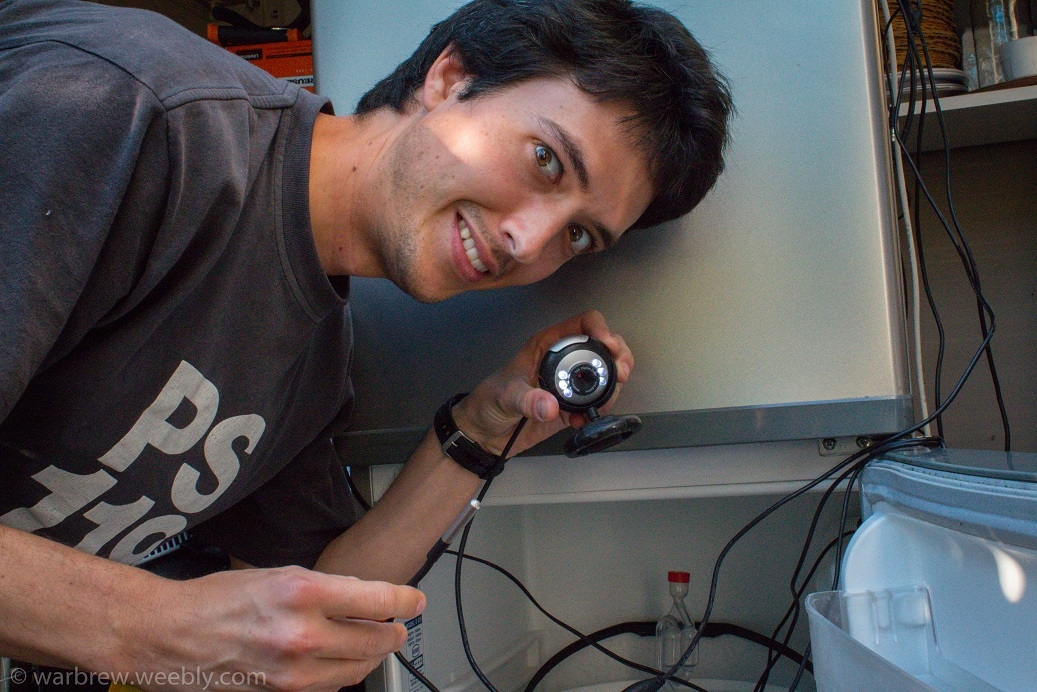
Which conveniently brings me to the "geek chic" part - the fermentation fridge. Graeme has taken his home brewing expertise to a new level by using an old fridge and some new tech enabling him to monitor and completely control the temperature of his fermentation environment from his laptop. The original thermostat of the fridge is disabled - actually it broke, a bitter-sweet moment I guess. To provide heat he has gone the easy and effective route and installed a light bulb which generates heat when switched on. For monitoring everything, it is hooked up to an Adruino/old desktop combo armed with BrewPi which connects to the home Wifi. He has installed temperature monitors to pickup the ambient temperature within the fridge and another attached to the actual fermentation vessel to monitor the brew. The final touch is a webcam mounted on the bucket to keep an eye on the airlock to detect any kind of delays or irregularities in the fermentation process.
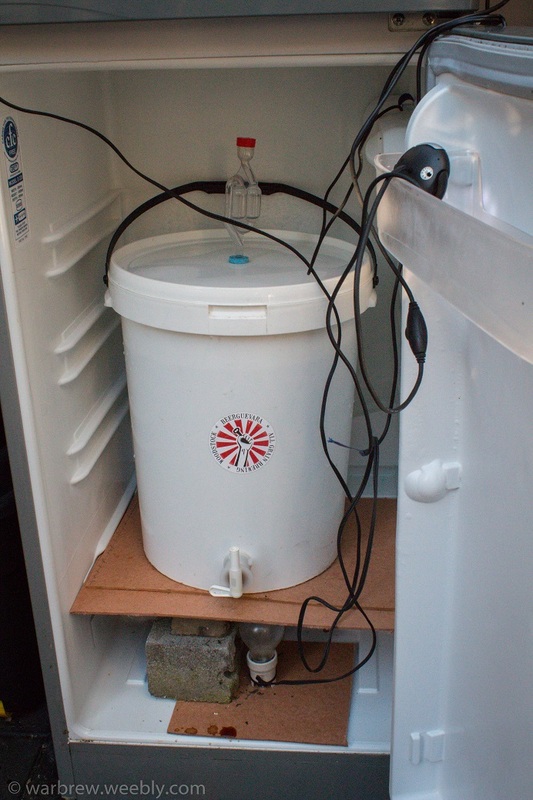
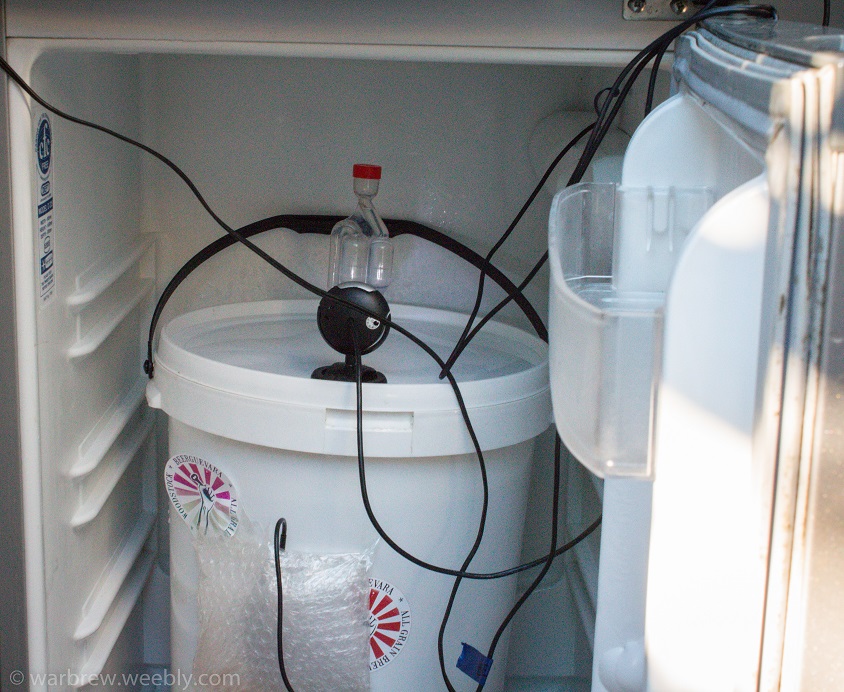
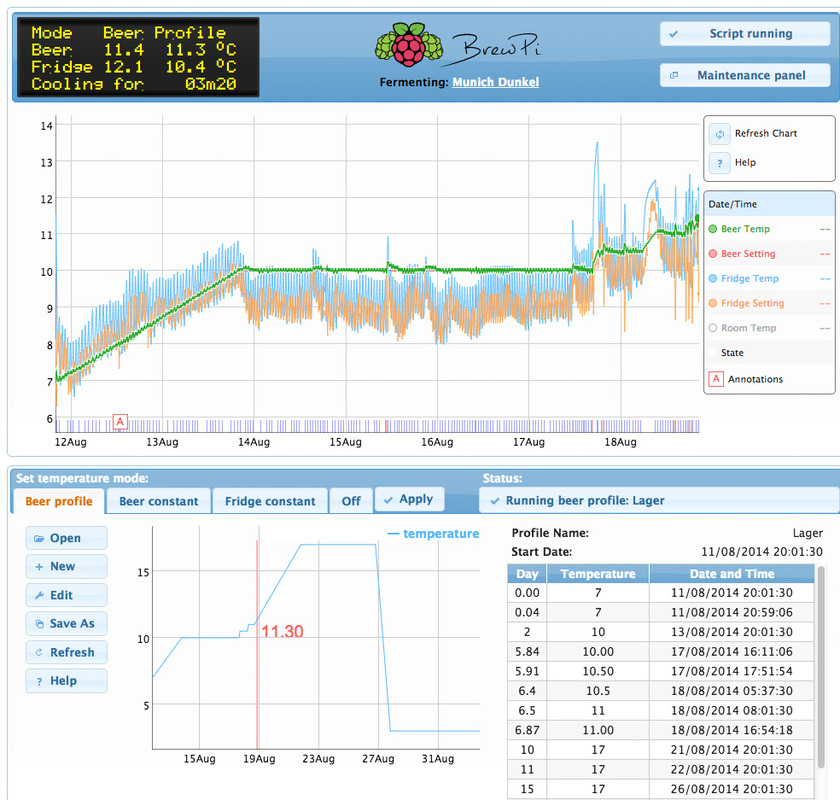
The geekiest part about all this is that Graeme is able to both set and keep a detailed record of temperature and fermentation duration for each and every brew using the BrewPi software. This is an actual screenshot of the progress of the Munich Dunkel that was brewed on that beautiful, sunny Saturday afternoon.
This kind of control is often desired as you can speed up fermentation and eventually produce a much clearer beer by doing a "cold crash" toward the end of the cycle. It is also beneficial to control the fermentation environment to prevent excessive temperature fluctuations which can ultimately affect the yeast. An additional advantage is that one can now keep a pretty decent log of past brews and even start experimenting with lager style beers that need much lower fermentation temperatures.
This kind of control is often desired as you can speed up fermentation and eventually produce a much clearer beer by doing a "cold crash" toward the end of the cycle. It is also beneficial to control the fermentation environment to prevent excessive temperature fluctuations which can ultimately affect the yeast. An additional advantage is that one can now keep a pretty decent log of past brews and even start experimenting with lager style beers that need much lower fermentation temperatures.
By the end of the day I left with a little take-away of this Munich Dunkel in one of my little glass fermenters and a yogurt tub of reclaimed Ale yeast to be pitched later. It will be interesting to see how my "ale version" compares to the proper "lager version" of this batch.
All-in-all a pretty cool day hanging out with the Mowbrew-crew (it has a certain ring to it!) chatting about world economy, interesting world news and of course beer...lots of beer...
All-in-all a pretty cool day hanging out with the Mowbrew-crew (it has a certain ring to it!) chatting about world economy, interesting world news and of course beer...lots of beer...
| Graeme was kind enough to share the recipe for the Munich Dunkel along with his story. Feel free to give it a shot! * unfortunately Wes, a long-time member of the Mobrew-crew, was only able to join us for an hour on brew day due to work commitments, but he still gets a shout-out! |
| ||
 RSS Feed
