This past weekend my brew-buddy and I stepped up in rank and put together our own little 45 litre DIY mash tun. In the end it was actually so simple I cannot believe we did not do this sooner! From now on, no more DME and partial mash...it is time we grow our beards, eat hops on our Corn Flakes and brew all grain!
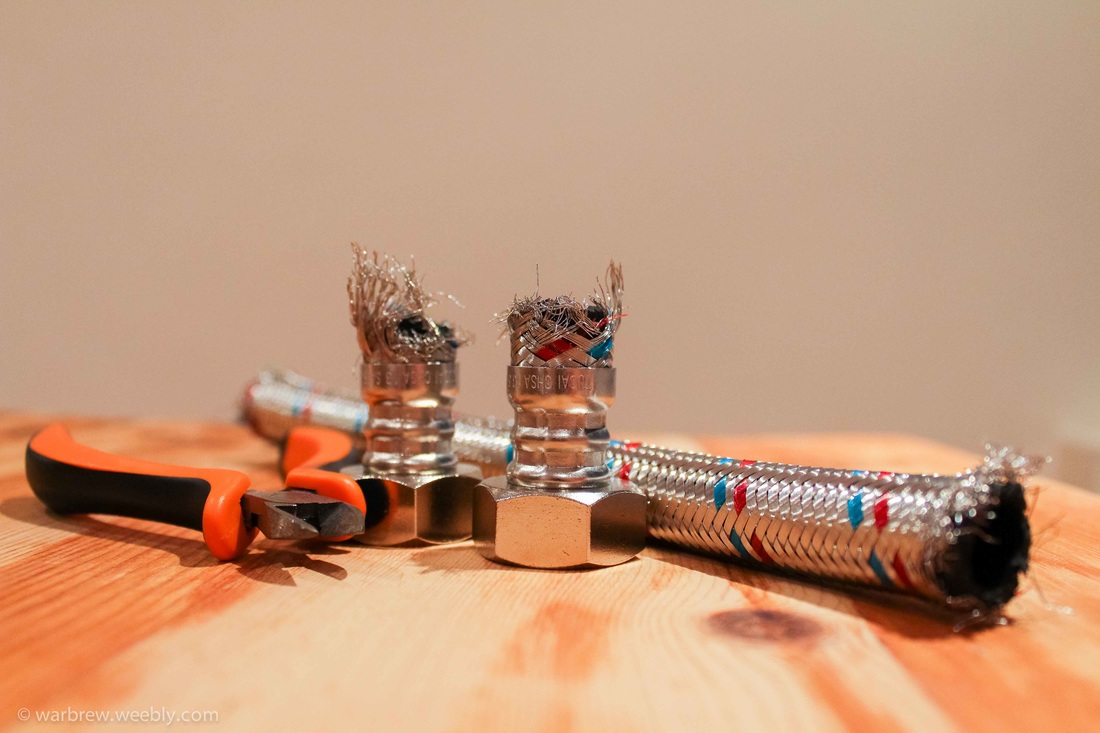
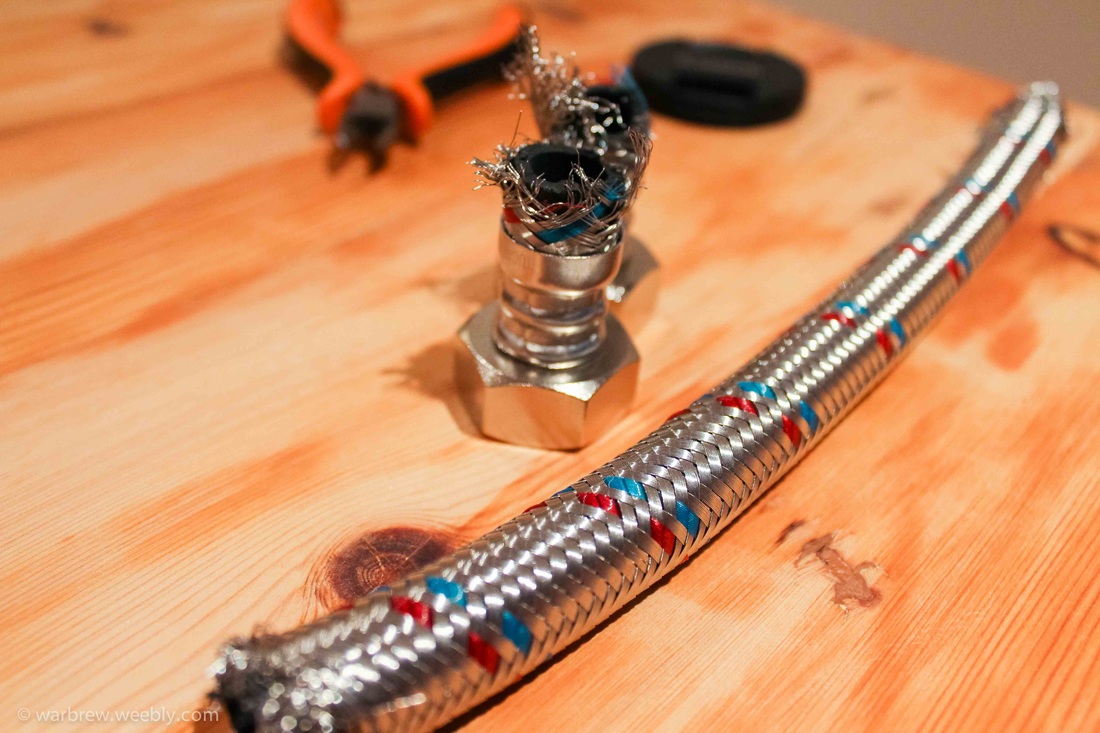
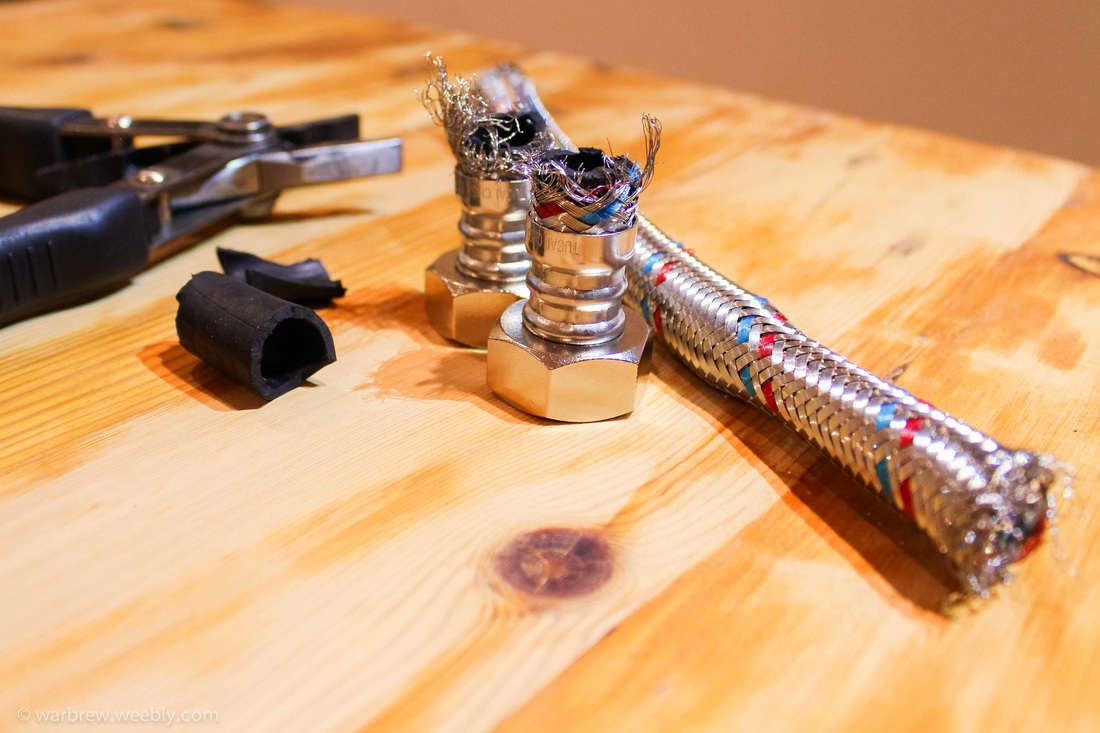
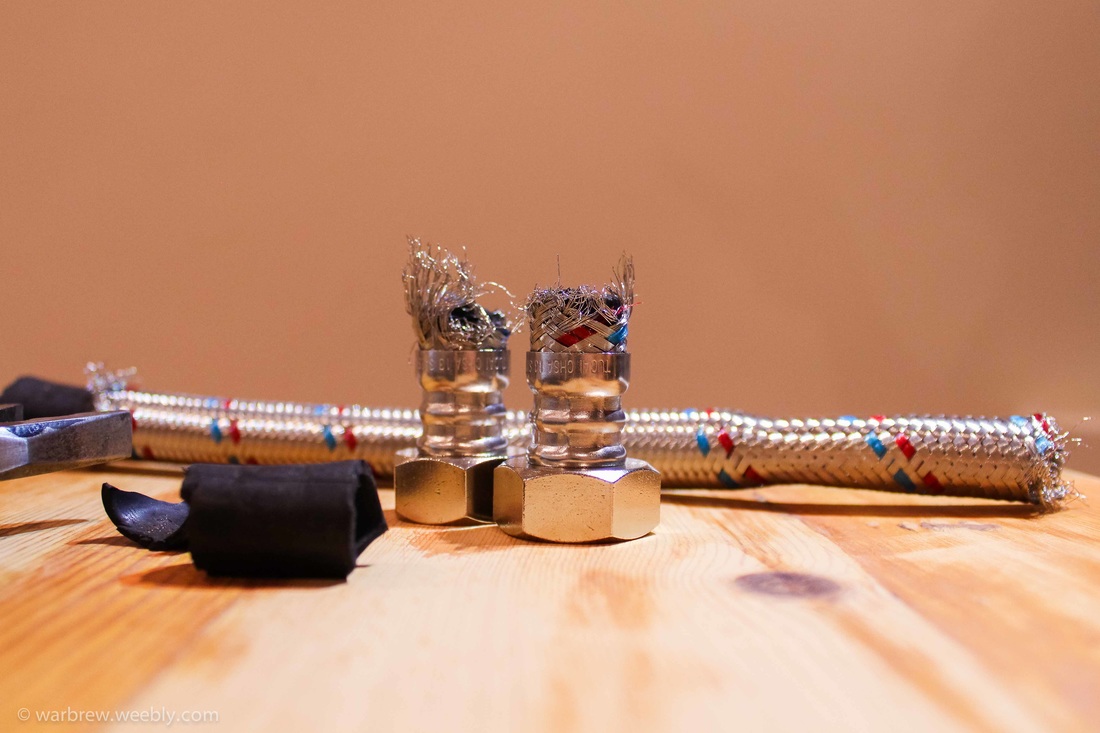
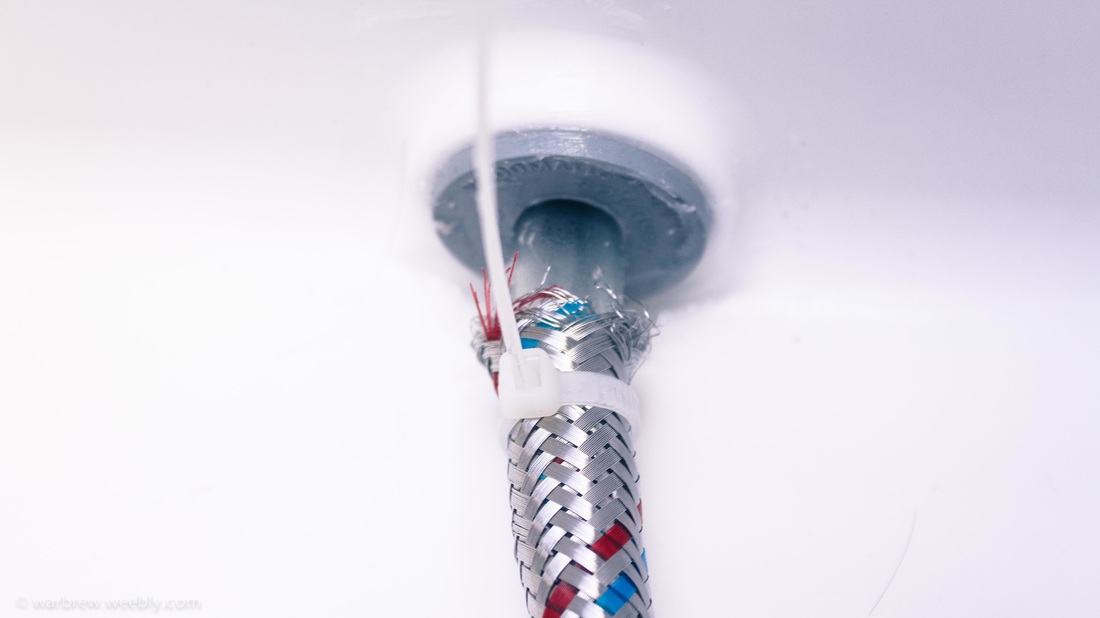
The first step was to acquire the braided tubing (actually for plumbing) that is to act as the filter. The trick here is to remove the inner tubing so only the braided stainless steel is left as it leaves tiny little holes that will allow the liquid to run through, but leave the junk behind...well, most of it I guess. We plan to incorporate this filter with the genius Vorlauf sparging technique that I observed the lads of Mowbrew use for maximum filtration efficacy or MFE (yeah, I just made that up).
The complete list of accessories and estimated cost along with possible suppliers:
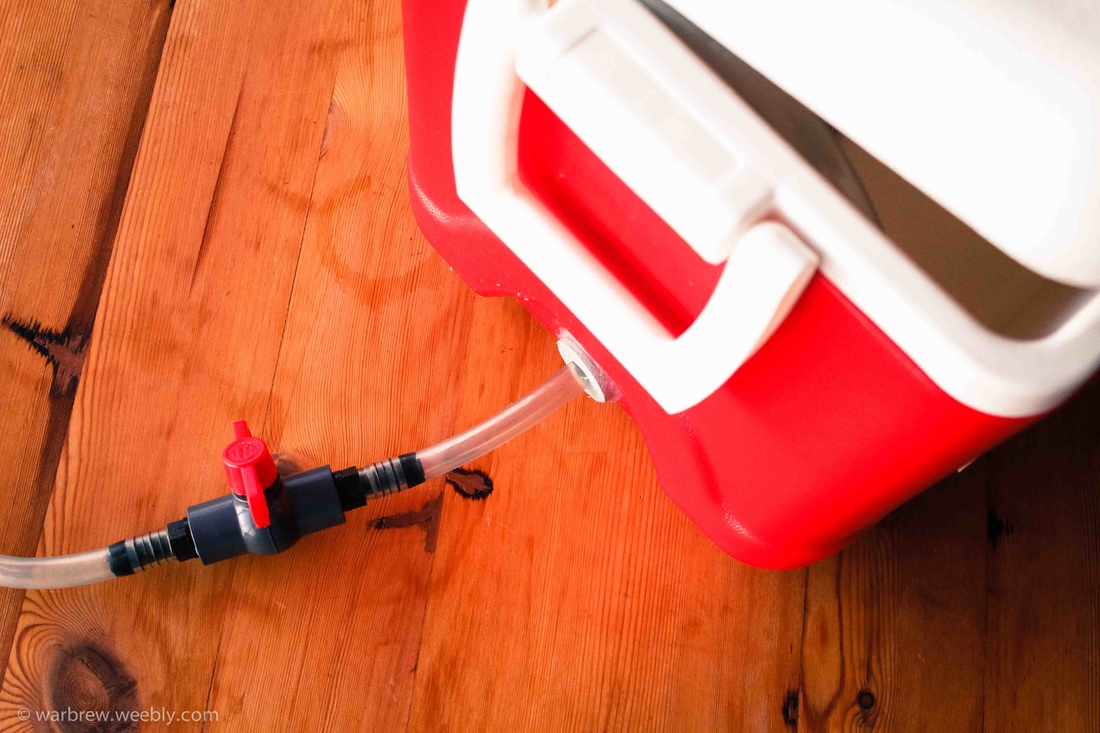
- Camp Master 45 litre cooler box with water drain plug - R499 Makro (I bought mine for a bit cheaper when they were on special a while back)
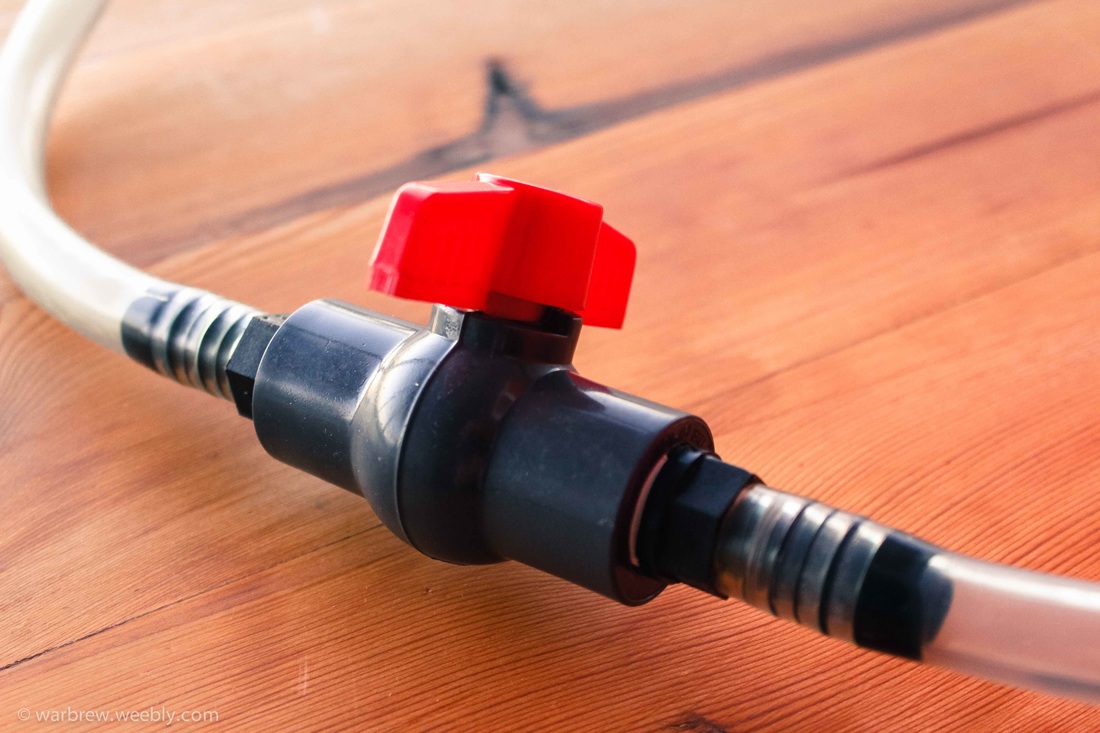
- clear tubing (13mm wide) - most hardware and beer supply stores
- plastic ball valve tap - +-R30 most hardware stores
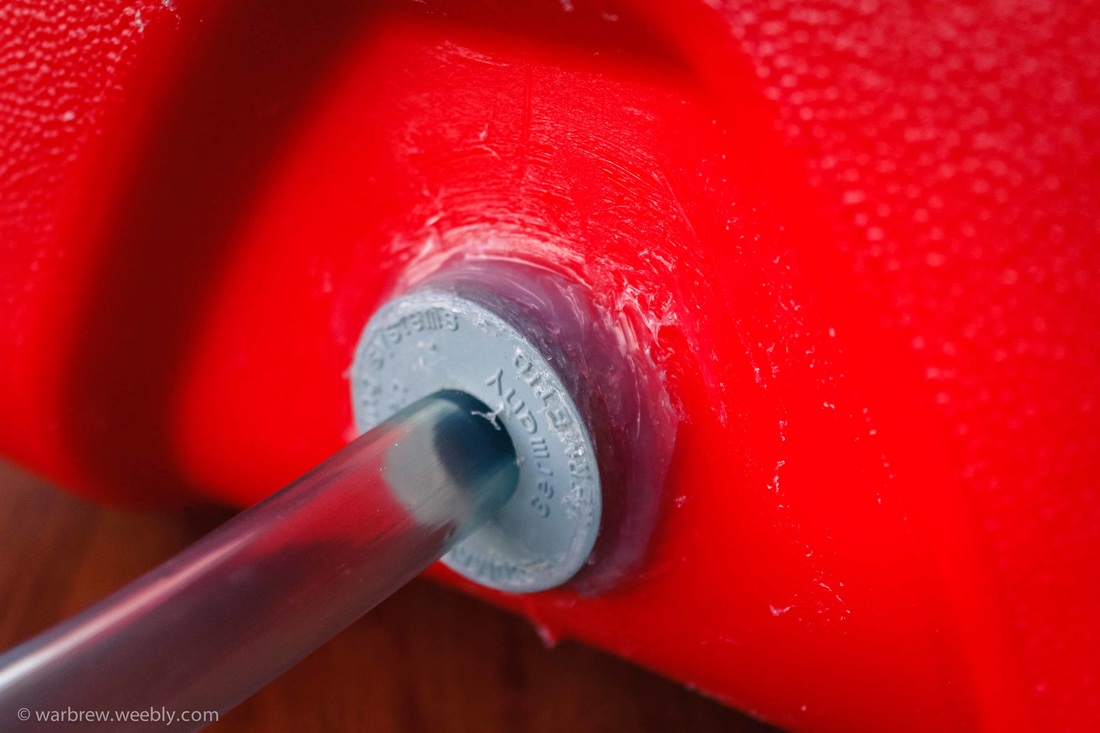
- two keg bungs - R90 Beerlab
- food safe silicone (very important that this be food safe!!!) - +-R150 Wurth
- plumbing hose (inner tubing removed to leave stainless steel braided cover) - most hardware stores
- cable ties
The Process of assembly
Firstly we warmed up the tubing that was to go through the drain hole in the cooler, this way it would be slightly easier to slide through the hole/bung combination. Once warmed up and soft, we inserted the the outside bung and pushed the tube through.
With enough "slack" on the inside we slid over the inside bung and ensured to push that one up as far as possible against the cooler.
We then applied a reasonable amount of the food safe silicone to seal it up on the inside and then attached the stainless steel braid which is to act as a filter.
Leaving for the party we decided it would be good to let the silicon set a little before forcing the outside bung closer a little and applying more silicone - which is exactly what we did a couple hours later upon our return.
The entire process took about fifteen to twenty minutes in total which was pretty surprising. The hardest part was actually just sourcing the parts and getting around to eventually building the damned thing!
One-two-skip-a-few, now a mash tun ready to brew! (sadly, I just made that up too...)
And that was all she wrote...the next day we decided to give it a quick test so we boiled up the kettle and poured it into the tun along with some cold water (only about five or so litres just to cover the pipes and bungs) to ensure there are no leaks. This silicone needs about 24 hours to properly set and create a solid seal so make sure to build it the weekend before or at least a day or two before your next brew as this is no "build-and-brew" type deal.
And that was all she wrote...the next day we decided to give it a quick test so we boiled up the kettle and poured it into the tun along with some cold water (only about five or so litres just to cover the pipes and bungs) to ensure there are no leaks. This silicone needs about 24 hours to properly set and create a solid seal so make sure to build it the weekend before or at least a day or two before your next brew as this is no "build-and-brew" type deal.
We are very excited for our next brew to give this baby a run for its money. We have decided to go with a simple single hop Ale (either Cascade or Southern Passion) from a basic recipe just to get the hang of it as now we need to adjust the amount of mash and sparge liquor to ensure we do not overfill our 20 litre pot when boiling. This means we will probably have to mash with and sparge with less than what the recipe calls for and top up the water in the fermenter...time to experiment!
If you are interested in some tips or help or would even like to get hold of some of that silicone sealer please give me a shout. This is all about sharing information and learning through shared experiences at the end of the day.
Good luck with your project!!!
Good luck with your project!!!
 RSS Feed
